
If necessary, refer to HMRC Specials and Exclusions for online filing before proceeding.
Important: please click on the View Calculation button third icon from the left on the Toolbar before proceeding with an online submission.
In the Navigation pane click on Online Filing or the second icon from the left on the Toolbar. 
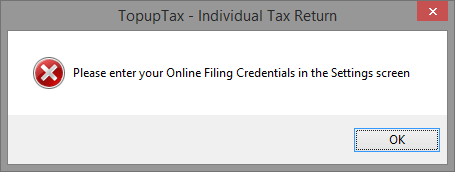
This screen warns if you have not entered your Online Filing Credentials.
If necessary, refer to HMRC Exclusions or HMRC Specials for online filing before proceeding.
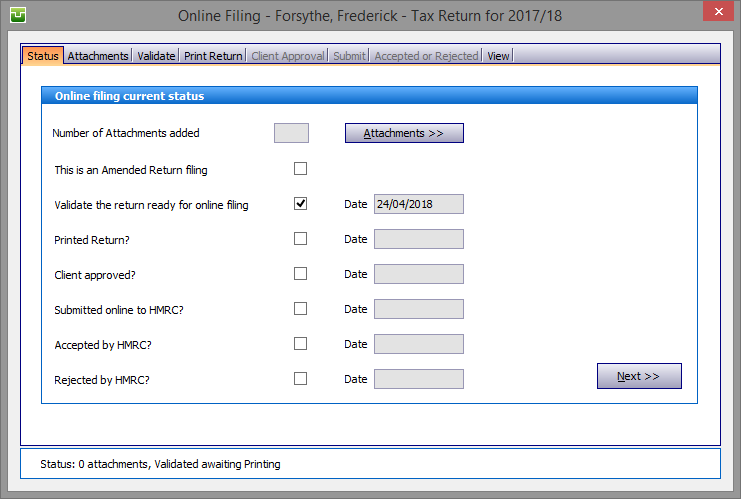
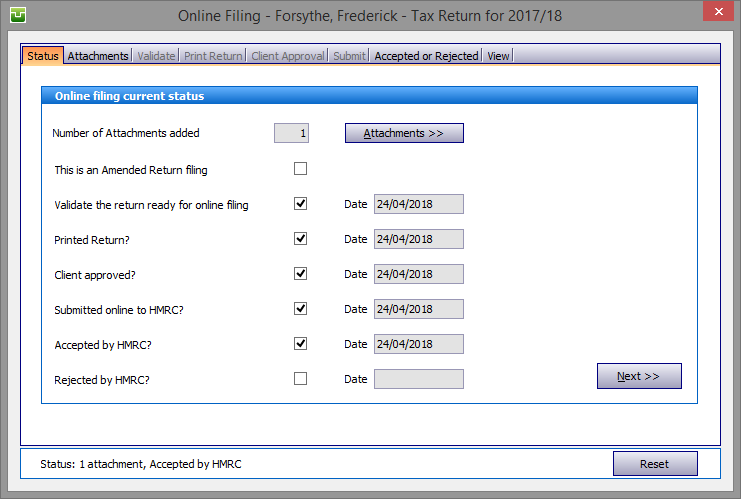
Status
This screen records progress of the online submission process.
Attachments
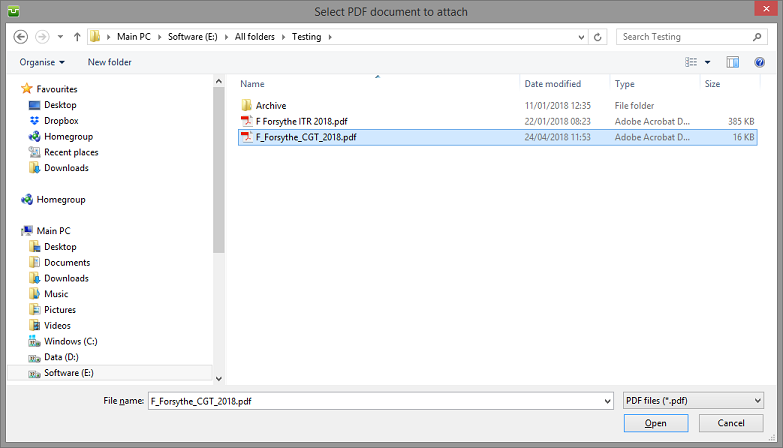
If there are pdf files to be attached to the return (mandatory where there are capital gains transactions) click on the Next button or the Attachments tab. Next click on the Add button to find the required file
Proceed by finding the pdf file stored on your system. (The one shown in the following illustration is by way of an example and not a location required by the program). Highlight the file and hit the Open button.
The View button in the bottom right hand corner of the screen is now accessible and is used to check the content of the PDF attachment. Note that this button disappears once the return has been validated, see below.
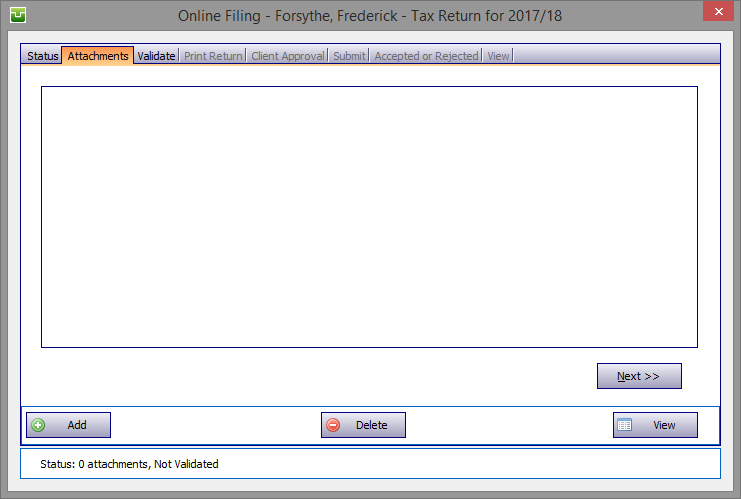
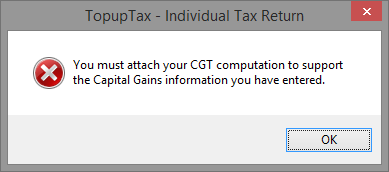
Since any submission incorporating a capital gains computation will be rejected by HMRC if no calculation is attached, this screen provides an advanced warning.
Then either click on the Next button on the Attachments tab or on the Validate tab.
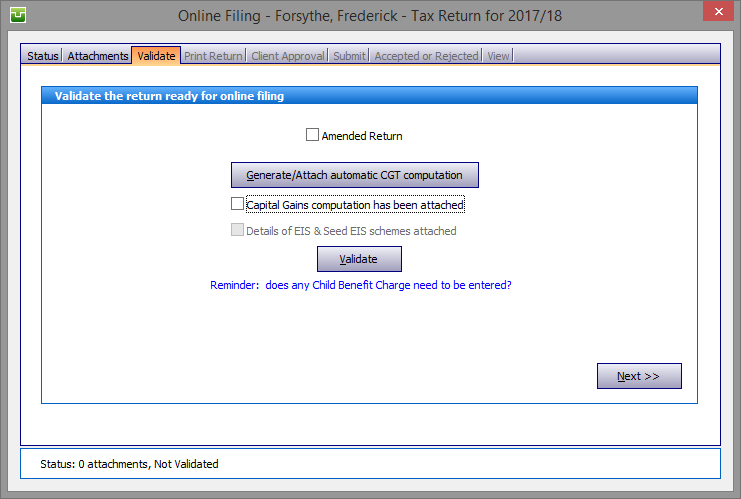
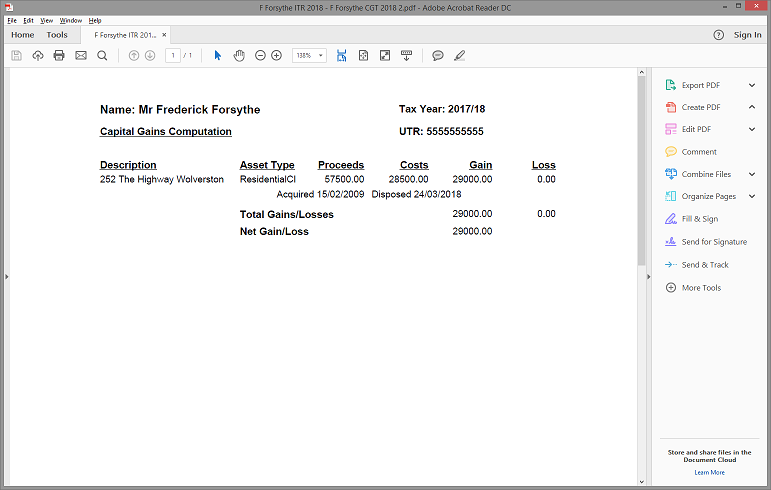
If you do not wish to complete a separate capital gains computation hit the Generate/Attach automatic CGT computation button and this prompts you to select the location to which you wish to save the automatically generated pdf file.
On saving, the CGT schedule produced by this program will be attached to the return.
Validate
If necessary, refer to HMRC Exclusions or HMRC Specials for online filing before proceeding.
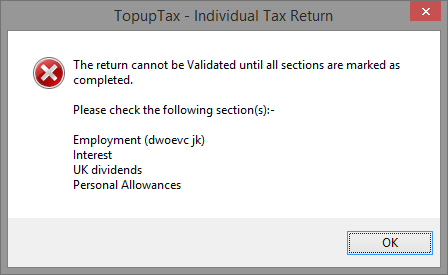
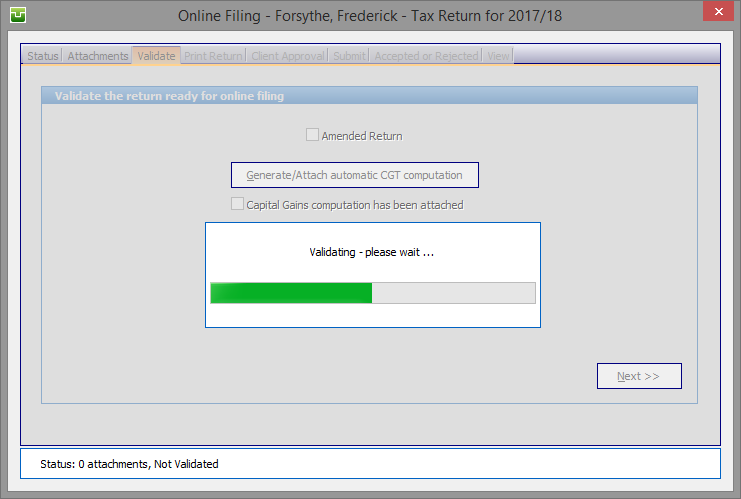
Next click on the Validate button, if there are any uncompleted sections the online process will not proceed, this screen advises which sections remain "open".
Other warnings indicate problems that will result in rejection by the Government Gateway.
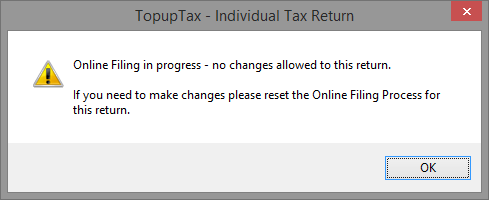
Once the online process has begun it will not be possible to make any changes to the tax return. Leaving the online process or subsequently clicking on View/Edit Tax Return brings up this screen.
Clicking on the Main Details of the client brings up this screen.

If, for any reason, you wish to stop the online process (perhaps because further entries are to be made to the return) click on the Invalidate button. All entries on the Status tab will then clear and the process must recommence.
Otherwise click on the Next button on the Validate tab or on the Print Return tab.
Amended Return
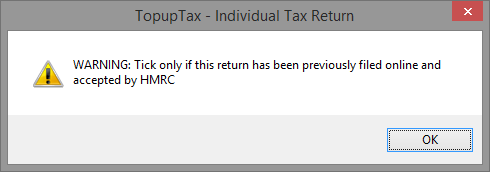
Check the Amended Return tick box if you need to submit an amended return. This screen warns that the return must have been previously submitted to and accepted by HMRC.
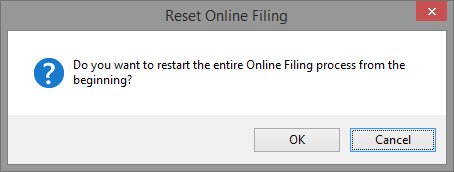
Next you must first go to either the Status or the Accepted or Rejected tabs and hit the Reset button. Before proceeding the program requests confirmation that you wish to restart the entire online process. Clicking on the OK button clears all entries on the Status tab.
Continue by adding attachment(s) as appropriate and move to the Validate tab. Check the Amended Return tick box and click on the Validate button. Proceed to print the amended forms etc.
Note that in order to examine the content of any attachment post Validation the View tab is now accessible.
Continue by clicking on the Next button or the Print Return tab. Note that the when printing to PDF you have the option to encrypt the return by selecting the encryption method from the drop down list. The default setting is Not Encrypted but this may be changed in the Settings/Online Filing tab.
Print Return
Check the Print IRmark on schedules tick box as required.
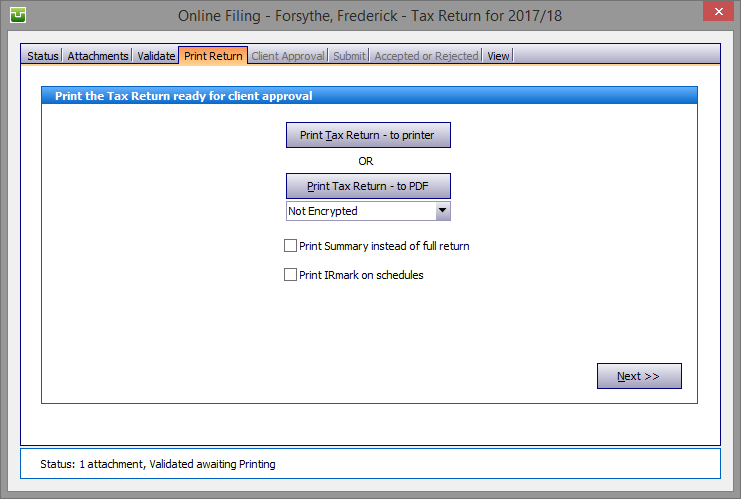
To print the return click on the Print Return tab and select either the to printer or to pdf buttons.
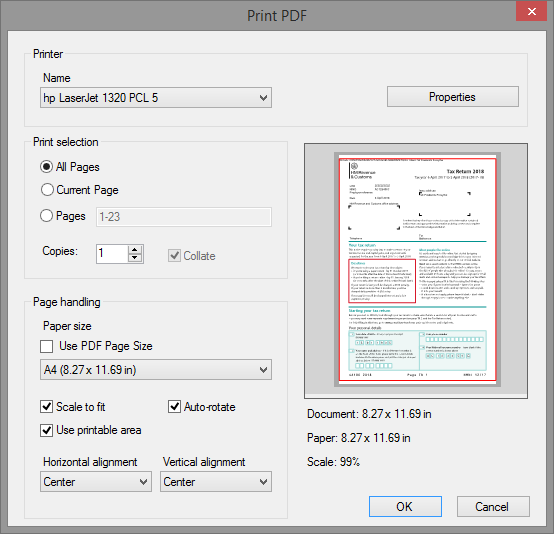
Clicking the to printer button brings up your default printer set-up screen and once you have selected settings click the Ok button.
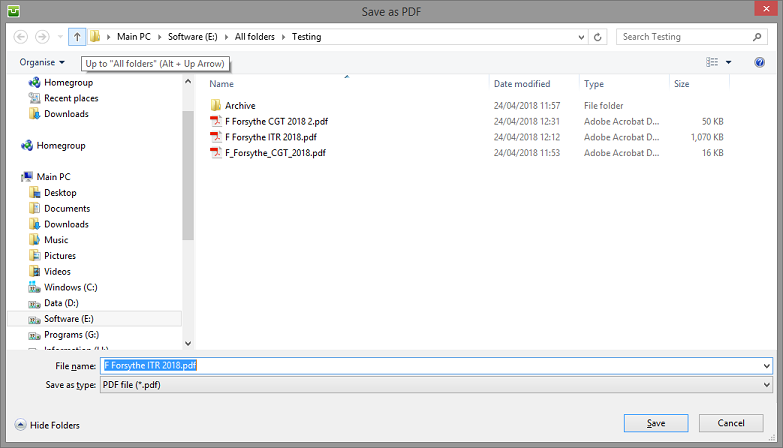
Clicking the .... - to pdf button brings up the Save as PDF screen. Next choose the location within your system where you wish to save the pdf file. In this example the file is automatically named F Forsythe ITR 2018.pdf although this may be overwritten as desired..
The location shown in the following illustration is an example and not one required by the program. Next click on the Save button.
Click on the Next button on the Print Return tab or on the Client Approval tab.
Client Approval
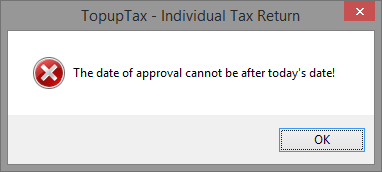
Enter the date on which the client signed the return as approved and hit the Validate date button.
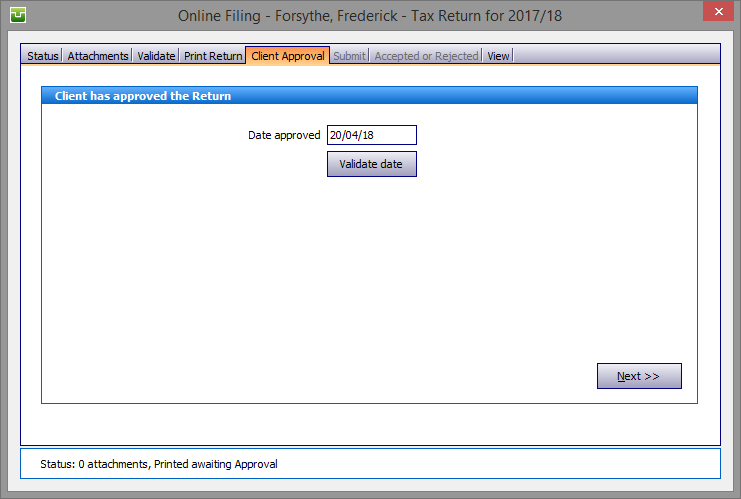
The date of approval cannot be after the current date.
Click on the Next button on the Client Approval tab or on the Submit tab.
Submit
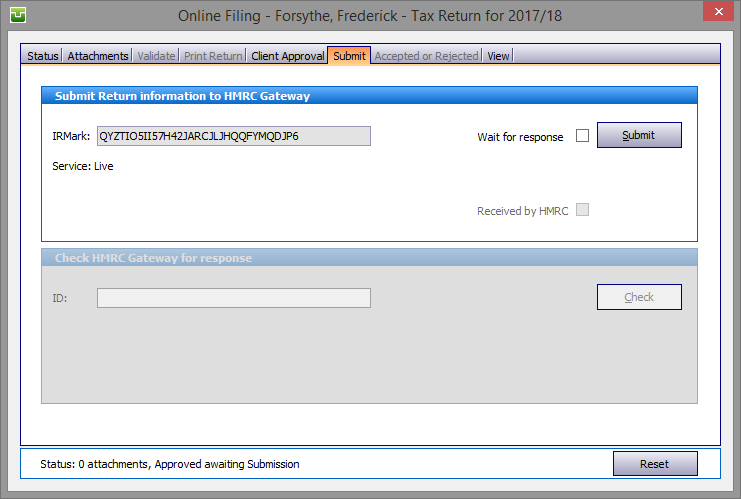
The return now bears a unique IRMark and is ready to submit to HMRC. Before clicking on the Submit button please check that The Service is set to Live or the submission will not be accepted by HMRC. If it has been set to Test Live (for testing connections etc.) please re-select Live on the Settings/Online Filing tab.
Check or uncheck the Wait for response tick box option as required:
Option a. may be quicker at times when the Government Gateway is busy.
The Received by HMRC tick box is checked by the program to confirm receipt. The ID/IRMark appears in the Check HMRC Gateway for response section. Hit the Check button to receive an Accepted/Rejected message.
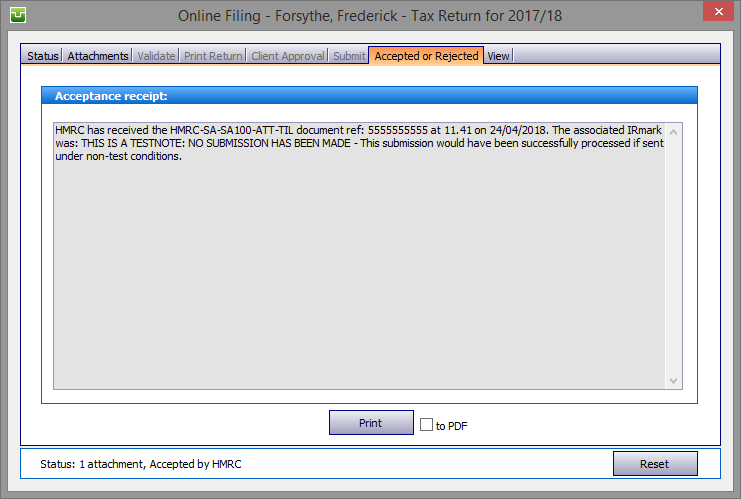
Acceptance/Rejection
If your submission is accepted:
If rejected:
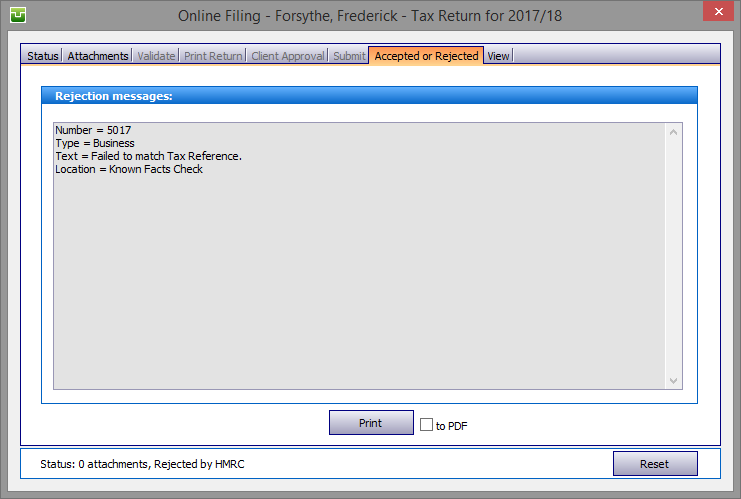
It is recommended that a copy of the Acceptance is printed for record purposes and you may feel it prudent to print a Rejection notice to which to refer pending resolution of the problem.
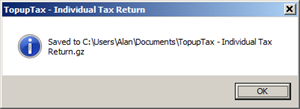
The Save to XML to file button is a support tool which you only need use when requested by a member of our support team. So that the document is easily accessible it is saved to your C:\Documents..... location.
Click on the Reset button to clear the entire process.
Once you have corrected the problem it is necessary to repeat the online submission.
Finally
The Status tab displays the progress of the submission.

Copyright © 2025 Topup Software Limited All rights reserved.